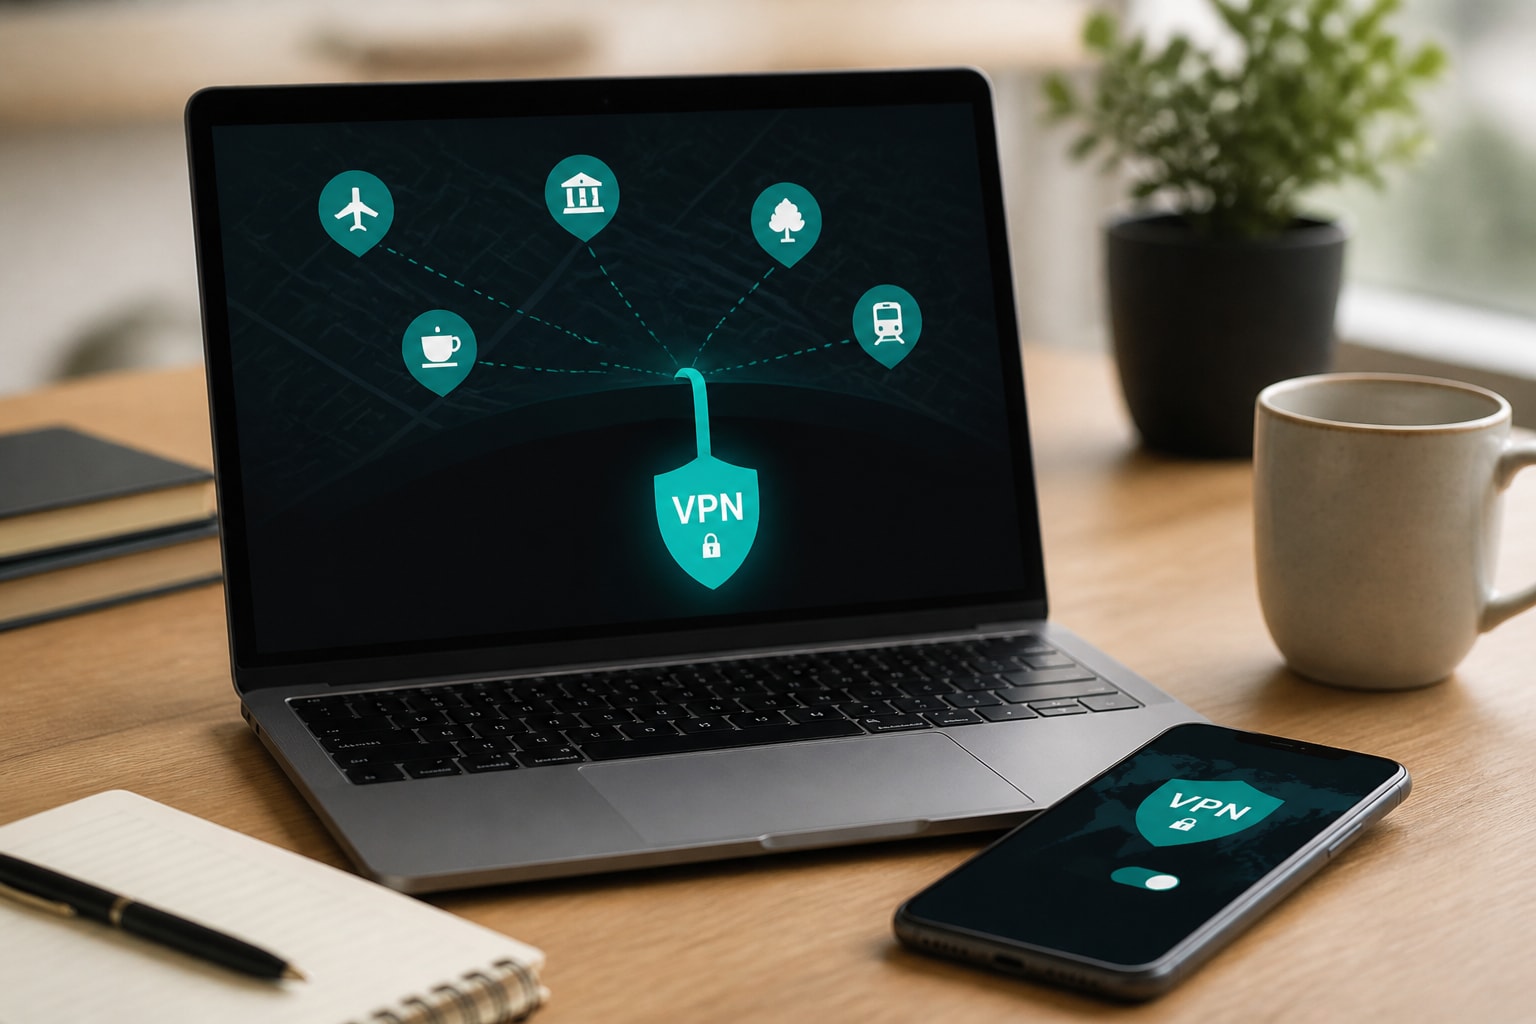





To set up a VPN on a router, you confirm your router supports VPN client mode, download a configuration file from your VPN provider, import it in the router's admin panel, and then test the connection for IP and DNS leaks. This guide explains how to setup VPN with router hardware in plain steps, so every phone, laptop and smart TV in your home sends its traffic through an encrypted tunnel without a separate app on each device.
For privacy-conscious users, the appeal is clear. Your internet service provider (ISP) sees only encrypted data leaving the router, advertisers lose one of their easiest tracking signals, and devices that cannot run VPN software are covered automatically.
Why Put a VPN on Your Router Instead of Your Devices
A router-level VPN protects every device on your network at once, including ones that have no VPN app, such as smart TVs, game consoles and streaming sticks.
The trade-offs are worth weighing before you commit:
- Coverage: Everything connected to the router is protected, including guests and devices you forget about.
- Convenience: You configure once, and there are no device limits to manage or apps to update.
- Always on: The tunnel stays up without anyone remembering to connect.
- Less flexibility: By default, all traffic uses the same VPN server unless your router supports per-device rules.
- Speed: Router CPUs handle encryption more slowly than a modern laptop or phone, so throughput can drop on older hardware.
A practical approach for many households is to run the VPN on the router for baseline protection and keep a device-level app for laptops and phones that travel. Our breakdown of how routers and VPNs work together covers that combination in more detail.
How a Router VPN Works With Your Wi-Fi
A router VPN works by making the router itself the VPN client: it builds one encrypted tunnel to a VPN server and forwards all your Wi-Fi and wired traffic through it.
Your devices still connect to Wi-Fi exactly as before. The difference happens one step later. Instead of sending data straight to your ISP, the router wraps it in encryption (ZioFree uses strong encryption) and sends it to a VPN server, which forwards it to the destination site. To outside observers, your home network appears to be at the server's location. If you want the underlying mechanics, how a VPN network works explains tunneling and encryption step by step.
One distinction matters here. A router can act as a VPN client, which sends your traffic out through a provider, or as a VPN server, which lets you dial back into your home network. This article covers the client setup. ASUS notes that using a router as a server requires a public WAN IP address from your ISP, which is a separate topic from protecting your browsing.
Step 1: Check That Your Router Supports VPN Client Mode
Your router must support VPN client mode, either through its stock firmware or through custom firmware, before any other step matters.
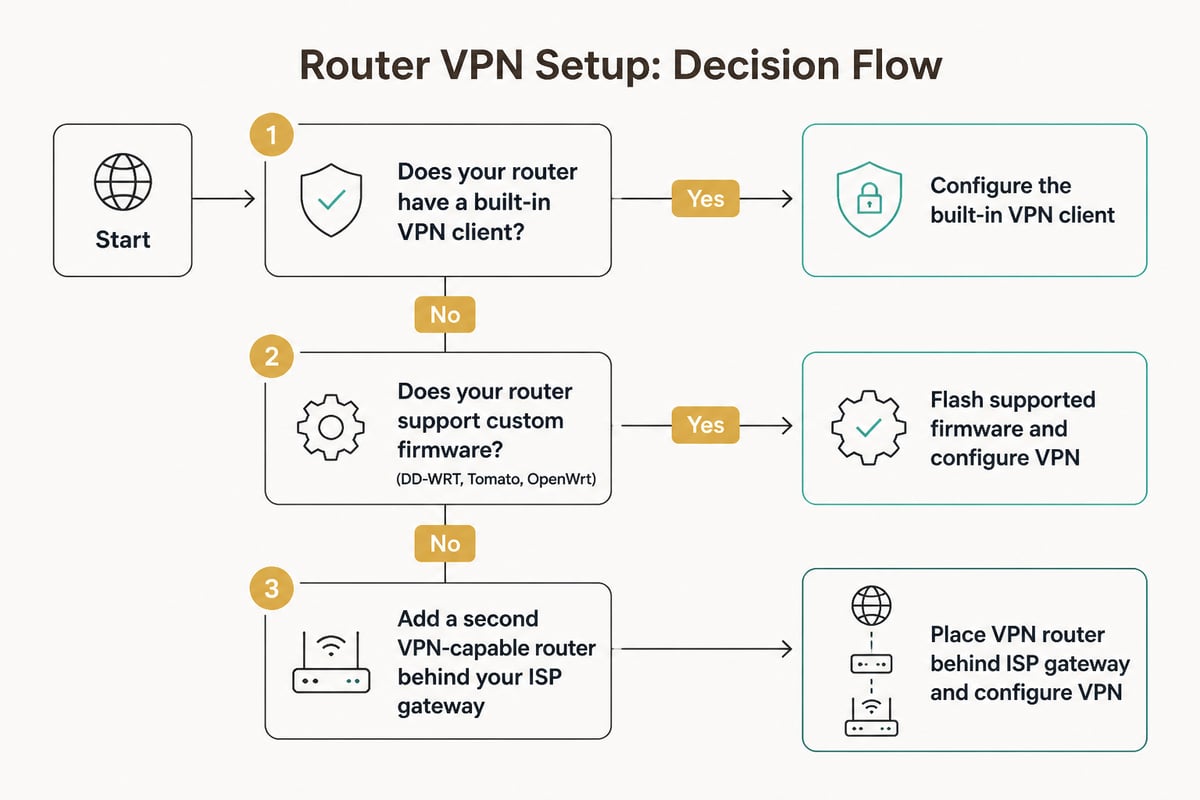
Most routers fall into one of three groups:
- Routers with a built-in VPN client. Many mid-range and high-end models from ASUS, Netgear, TP-Link and Synology include an OpenVPN or WireGuard client in the admin menu.
- Routers that accept custom firmware. Models supported by DD-WRT, Tomato or OpenWrt can gain VPN client features through a firmware flash.
- Routers with no VPN support. Many ISP-supplied gateways fall here. You can place a VPN-capable router behind them in a double-NAT arrangement.
Log in to your router's admin page, usually at 192.168.1.1 or 192.168.0.1, and look for a section named VPN, VPN Client, VPN Fusion or OpenVPN Client. Also record your firmware version. Some features depend on it: ASUS's WireGuard client in VPN Fusion, for example, requires firmware later than version 3.0.0.4.388.23000.
If you plan to flash custom firmware, confirm your exact model and hardware revision on the firmware project's compatibility list first. A wrong image can leave the router unusable.
Step 2: Choose a Protocol and Gather Your VPN Details
Choose OpenVPN or WireGuard based on what your router supports, then collect the configuration file and credentials from your VPN provider.
ASUS's documentation advises confirming which VPN connection type your provider supports before you configure anything, and its VPN Fusion guide adds that the server and client must use the same VPN type. In practice that means:
- OpenVPN: Widely supported, mature and flexible. It works on nearly every router with VPN client features, though it is heavier on older CPUs.
- WireGuard: Lighter and usually faster on modest hardware, but available only on newer firmware.
For a deeper look at how ports and protocols affect reliability, see this guide to VPN protocols and ports.
Before you open the router, gather:
- The
.ovpnor WireGuard configuration file from your VPN account - Your VPN username and password, which are often separate from your account login
- The server location you want (choose one near you for better speed)
Choose a provider whose policies match your privacy goals. ZioFree, for instance, operates a strict no-logs policy and is built around privacy protection. Free VPNs often offer weaker privacy guarantees, which is why this guide assumes a paid service. For the reasoning, read paid VPN versus free.
Step 3: How to Setup VPN With Router Firmware Using OpenVPN
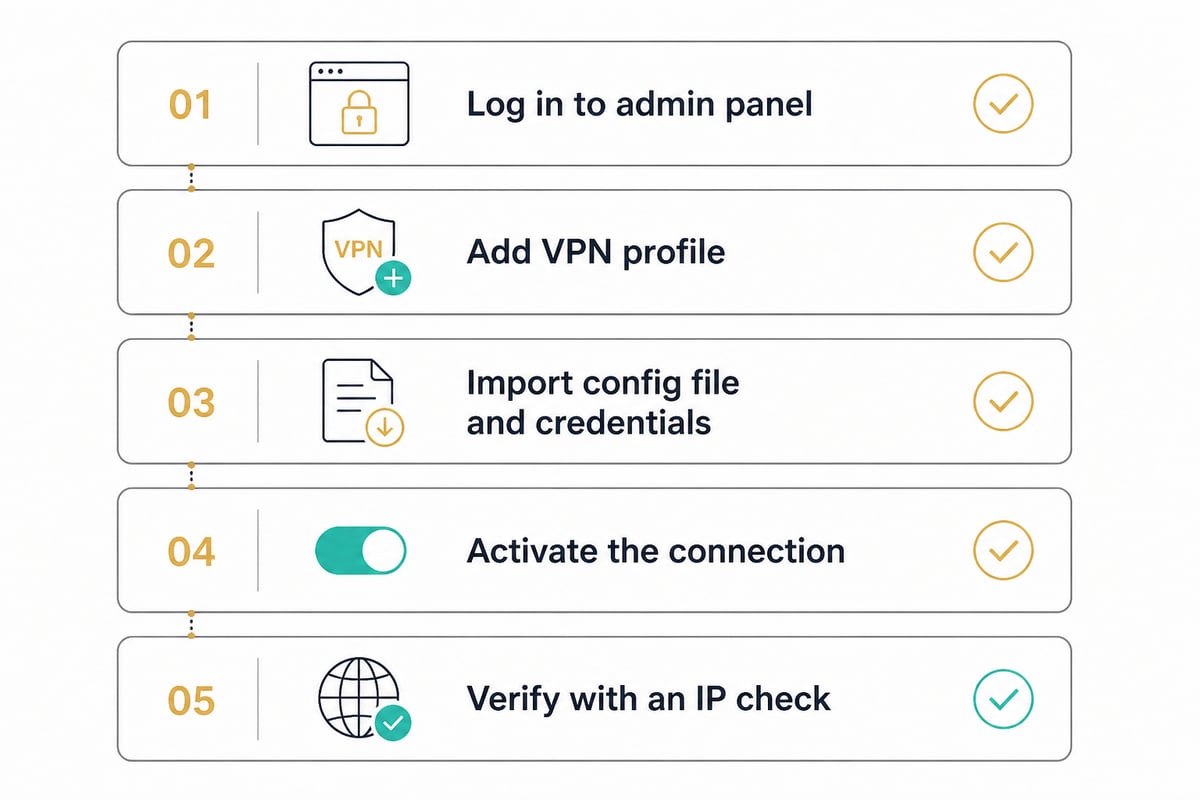
For an OpenVPN setup on stock router firmware, you import the provider's configuration file, enter your credentials and activate the profile.
The exact menu names differ by brand, but the sequence is consistent. Using ASUS as a reference, which documents the process in its OpenVPN client setup guide:
- Log in to the router's admin interface.
- Open the VPN section and select the VPN client or VPN Fusion tab.
- Add a new profile and choose OpenVPN as the connection type.
- Enter a description, then your VPN username and password.
- Upload the
.ovpnfile you downloaded from your provider. - Save the profile and click Activate or Connect.
ASUS documents that a tick icon indicates a successful connection. Other brands show a green status or a "Connected" label instead.
If the profile fails to connect, check these in order:
- Your username and password match the VPN credentials, not your account email login
- The router's date and time are correct, since certificate checks fail when the clock is wrong
- The server you picked is online, so try a different server file
- Your firmware is current
Step 4: Set Up a WireGuard Connection
WireGuard setup follows the same pattern as OpenVPN, but you import a WireGuard configuration instead and the connection tends to establish faster.
On routers that support it, the steps are:
- Update the router firmware to a version that includes the WireGuard client.
- Open the VPN client section and add a WireGuard profile.
- Import the configuration file or paste the private key, peer public key, endpoint and allowed IPs.
- Save and activate the profile.
A useful capability on some models is per-device assignment. ASUS's VPN Fusion lets you assign specific end devices to a VPN client profile before applying settings. That means your laptop can use the VPN while a streaming box that needs a local connection stays outside it.
Step 5: Flash DD-WRT, Tomato or OpenWrt If Needed
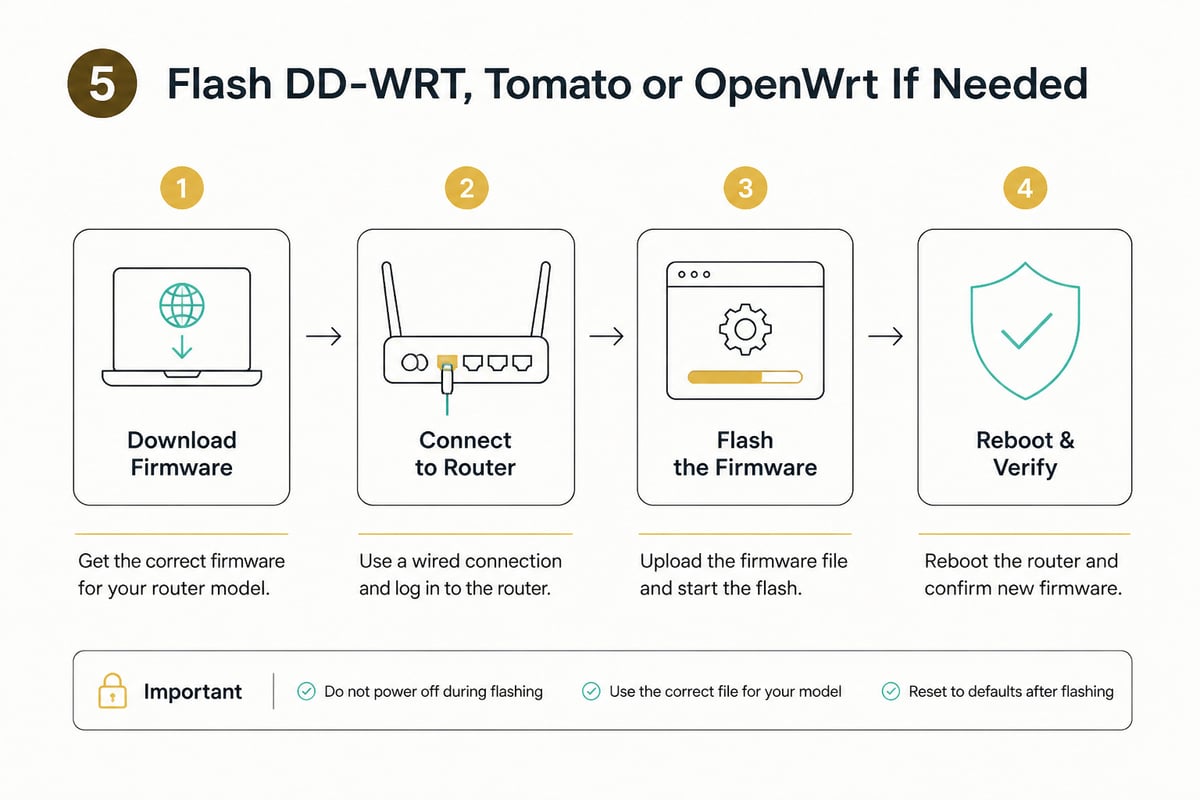
If your stock firmware lacks a VPN client, flashing a custom firmware such as DD-WRT, Tomato or OpenWrt adds one, at the cost of some risk and effort.
The general process:
- Look up your exact router model and hardware version on the firmware project's supported device list.
- Download the correct image and read the model-specific instructions, since some routers need an intermediate "trailed" build.
- Back up your current settings and note your ISP login details if your connection needs them.
- Upload the new firmware through the admin panel's upgrade page, and do not interrupt power during the flash.
- Wait several minutes, then reset to defaults if the instructions call for it and log in at the default address.
After flashing, the VPN section usually offers an OpenVPN client page with fields for the server address, port, protocol, encryption cipher and certificates. Copy these values from your .ovpn file. Custom firmware also gives you features stock firmware lacks, such as policy-based routing and DNS controls.
Step 6: Test for IP and DNS Leaks
After the router connects, verify three things: your public IP address changed, your DNS requests go through the tunnel and your connection speed remains acceptable.
Run this short checklist from a device on the network:
- IP address check: Search "what is my IP" and confirm the address and location belong to the VPN server, not your ISP.
- DNS leak test: Use an online DNS leak test and confirm the resolvers listed are not your ISP's. A leak here defeats much of the purpose, so see how to hide your IP address for related checks.
- Connectivity check: Browse several sites and open a streaming service to confirm nothing is blocked.
- Speed test: Compare results with and without the VPN active. Moderate loss is normal. A severe drop suggests a distant server or an underpowered router.
- Router logs: Open the VPN log and look for repeated reconnect attempts or authentication errors.
If your VPN supports a kill switch, test it by disabling the tunnel and confirming traffic stops. On a router, the equivalent is a rule that blocks WAN access when the tunnel drops, which some firmware calls "Block routed clients if tunnel goes down."
How to Connect to the VPN From Your Devices Afterward
Once the router holds the tunnel, connecting is automatic: any device that joins your Wi-Fi or plugs into the router is already inside the VPN.
There is nothing to install on the individual device. Your phone, smart TV and game console simply use the network as normal. You can confirm protection from any of them by loading an IP-check page in the browser.
Many households add a second Wi-Fi network or a second router for flexibility. One network sends all traffic through the VPN, and the other connects directly for devices that need local services or a nearby IP, such as banking apps that flag foreign locations. Our guide to setting up a VPN router for a PS5 shows how this works for a console, and travel router setups apply the same idea on the road.
What Are the Downsides of Using a VPN on a Router?
The main downsides of a router VPN are reduced speed on weaker hardware, less control over which traffic uses the tunnel and a more involved setup than installing an app.
Specifically:
- Speed overhead: Encryption adds processing load. Budget routers may cap VPN throughput well below your plan speed, while WireGuard and newer CPUs reduce the penalty.
- One server for everyone: Unless your router supports per-device rules, switching locations affects the whole household.
- Troubleshooting depth: A misconfigured profile can cut internet access for every device until you fix it.
- Local services: Some banking, streaming and smart-home services react badly to a VPN IP address.
A paid provider with unlimited bandwidth helps avoid hitting data caps across many devices. ZioFree VPN Monthly includes unlimited bandwidth and access to all servers, which suits a router carrying several people's traffic. If you still need selective routing for individual apps, ZioFree's split tunneling on supported devices complements the router-wide tunnel.
Is It Better to Have a VPN on My Router or My Device?
Putting the VPN on the router is better for always-on coverage of every device at home, while a device-level app is better for laptops and phones that leave the house.
A simple way to decide:
| Situation | Better choice |
|---|---|
| Smart TVs, consoles and IoT gadgets at home | Router |
| Laptop or phone used on public Wi-Fi | Device app |
| You want per-app control (split tunneling) | Device app |
| Many users, no setup by each person | Router |
| Fastest possible speeds on a modern device | Device app |
Combining both works well. The router covers your home network, and the device app protects you elsewhere. Be aware that running both on the same device creates a tunnel inside a tunnel, which slows things down, so disable the app while you are on your VPN-enabled home network. For public hotspots, see how a VPN protects you on public Wi-Fi.
FAQ
Do I need a special router to use a VPN?
Yes, in practice you need a router with a VPN client feature or one that can run custom firmware. Many ISP-provided gateways lack both, but you can connect a compatible second router behind them.
Will a router VPN slow down my internet?
Some slowdown is normal because the router must encrypt and decrypt all traffic. Choosing a nearby server, using WireGuard where available and running a router with a capable processor keeps the loss modest.
Can I use a router VPN with macOS devices?
Yes, because the tunnel runs on the router and Macs on your network are covered without any software. If you need a device app on a Mac, check ZioFree's current platform list, since router-level protection covers your network but not a Mac's travel use.
Your next step is to log in to your router today and check whether a VPN client option exists, noting your model and firmware version. If it does, a subscription such as ZioFree VPN Monthly gives you the configuration files, AES-256 encryption, a no-logs policy and unlimited bandwidth to protect every device at home. When you are ready to put it in place, ZioFree lets you get started now and secure your whole network from the router out.